Difference between revisions of "Python installation"
From ACL@NCU
| (25 intermediate revisions by the same user not shown) | |||
| Line 1: | Line 1: | ||
=Installing Python on your Windows laptop= | =Installing Python on your Windows laptop= | ||
==Files to download (from the Google Classroom "course materials" area)== | ==Files to download (from the Google Classroom "course materials" area)== | ||
#create a folder c:\temp, save the following files to this folder | |||
#Python 2.7.14 (win 32-bit) | #Python 2.7.14 (win 32-bit) | ||
#Adding Python27 path to environment | |||
#get-pip.py | #get-pip.py | ||
#install_python.bat | #install_python.bat | ||
#sq.py | |||
==Steps to follow== | ==Steps to follow== | ||
*Double click on the downloaded python-2.7-14.msi program. | |||
*[[Python_pathsetting|Setting path in the environmental variable]] | |||
*Open a [https://www.howtogeek.com/194041/how-to-open-the-command-prompt-as-administrator-in-windows-8.1/ command window] and change directory to where you saved get-pip.py | |||
<syntaxhighlight lang="DOS" style="border:3px dashed black"> | |||
cd c:\temp | cd c:\temp | ||
</ | </syntaxhighlight> | ||
*execute get-pip.py | |||
<syntaxhighlight lang="DOS" style="border:3px dashed black"> | |||
python get-pip.py | |||
</syntaxhighlight> | |||
*execute the install_python.bat script | |||
<syntaxhighlight lang="DOS" style="border:3px dashed black"> | |||
install_psychopy.bat | |||
</syntaxhighlight> | |||
*After the above process are completed (without error or interruption), try the following script: | |||
<syntaxhighlight lang="DOS" style="border:3px dashed black"> | |||
python sq.py | |||
</syntaxhighlight> | |||
*If everything works out, you should see a window containing a light blue square at the center as shown below (lasting for 2 seconds then vanishes). | |||
[[File:Sq.jpg]] | |||
=Install Python on Mac OSX= | |||
==Files to download== | |||
*assuming that you download files to the "Downloads" directory under your home directory, which is the default. | |||
#python 2.7.14 for mac (python-2.7.14-macosx10.6.pkg) | |||
#get-pip.py | |||
#install_python | |||
#sq.py | |||
==Steps to follow== | |||
*Install python 2.7.14 by double click on the downloaded python-2.7-14-macosx10.6.pkg program. | |||
*Install [https://itunes.apple.com/tw/app/xcode/id497799835?mt=12 xcode] for your version of Mac OS. | |||
*Open a [https://www.wikihow.com/Open-a-Terminal-Window-in-Mac terminal window] and change directory to where you saved get-pip.py | |||
<syntaxhighlight lang="bash" style="border:3px dashed black"> | |||
cd /Users/<Your account>/Downloads | |||
</syntaxhighlight> | |||
'''Note.''' "<Your account>" should be replaced by your own username on the Mac OS. | |||
*execute get-pip.py | |||
<syntaxhighlight lang="bash" style="border:3px dashed black"> | |||
python get-pip.py | |||
</syntaxhighlight> | |||
*execute the install_python script | |||
<syntaxhighlight lang="bash" style="border:3px dashed black"> | |||
bash install_psychopy | |||
</syntaxhighlight> | |||
*After the above process are completed (without error or interruption), try the following script: | |||
<syntaxhighlight lang="bash" style="border:3px dashed black"> | |||
python sq.py | |||
</syntaxhighlight> | |||
*If everything works out, you should see a window containing a light blue square at the center as shown below (lasting for 2 seconds then vanishes). | |||
[[File:Sq.jpg]] | |||
=In case of questions= | |||
#Please copy and paste the error message when you email me the questions. | |||
#You can also capture the screen that shows your problem during installation. Try using [https://www.techsmith.com/screen-capture.html Snagit] for screen capture. | |||
#In some cases on Windows, the following command | |||
<syntaxhighlight lang="DOS" style="border:3px dashed black"> | |||
python setup.py install | |||
</syntaxhighlight> | |||
or | |||
<syntaxhighlight lang="DOS" style="border:3px dashed black"> | |||
pip install <package> | |||
</syntaxhighlight> | |||
may require the Microsoft Visual C++ compiler for Python 27 to work. You can download this compiler from [https://www.microsoft.com/en-us/download/details.aspx?id=44266 here]. | |||
Latest revision as of 23:04, 9 March 2018
Installing Python on your Windows laptop
Files to download (from the Google Classroom "course materials" area)
- create a folder c:\temp, save the following files to this folder
- Python 2.7.14 (win 32-bit)
- Adding Python27 path to environment
- get-pip.py
- install_python.bat
- sq.py
Steps to follow
- Double click on the downloaded python-2.7-14.msi program.
- Setting path in the environmental variable
- Open a command window and change directory to where you saved get-pip.py
cd c:\temp
- execute get-pip.py
python get-pip.py
- execute the install_python.bat script
install_psychopy.bat
- After the above process are completed (without error or interruption), try the following script:
python sq.py
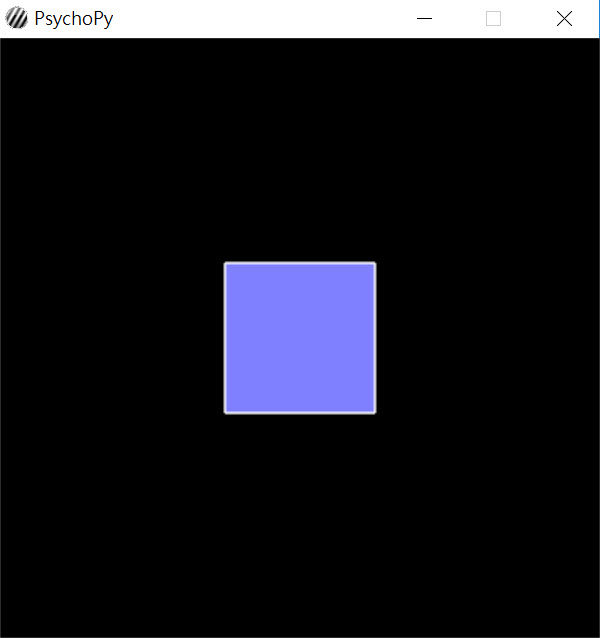
- If everything works out, you should see a window containing a light blue square at the center as shown below (lasting for 2 seconds then vanishes).
Install Python on Mac OSX
Files to download
- assuming that you download files to the "Downloads" directory under your home directory, which is the default.
- python 2.7.14 for mac (python-2.7.14-macosx10.6.pkg)
- get-pip.py
- install_python
- sq.py
Steps to follow
- Install python 2.7.14 by double click on the downloaded python-2.7-14-macosx10.6.pkg program.
- Install xcode for your version of Mac OS.
- Open a terminal window and change directory to where you saved get-pip.py
cd /Users/<Your account>/Downloads
Note. "<Your account>" should be replaced by your own username on the Mac OS.
- execute get-pip.py
python get-pip.py
- execute the install_python script
bash install_psychopy
- After the above process are completed (without error or interruption), try the following script:
python sq.py
- If everything works out, you should see a window containing a light blue square at the center as shown below (lasting for 2 seconds then vanishes).
In case of questions
- Please copy and paste the error message when you email me the questions.
- You can also capture the screen that shows your problem during installation. Try using Snagit for screen capture.
- In some cases on Windows, the following command
python setup.py install
or
pip install <package>
may require the Microsoft Visual C++ compiler for Python 27 to work. You can download this compiler from here.

